Before we go any further, we should point out that while the Switch is easily repaired, it has a warranty. If you open the Switch on your own, you’re going to void that warranty. In other words, if you’re still within your warranty period, just send your Switch back to Nintendo. You’ll have to wait a couple of weeks to get it back, but the repair will be free.
Now, we’re going to look at three of the best tool sets for repairing your Nintendo Switch. First off, we’ll review the Keten 130-in-1 Screwdriver Tool Repair Kit. This kit doesn’t just work with the Switch. It can also be used to repair the Super Nintendo or original Xbox. Next, we’ll look at the Starko 8-piece Nintendo Switch Tool Kit. This is a more barebones kit, designed to repair the Nintendo Switch and JoyCon controllers only. Finally, we’ll review the YOOWA Nintendo Switch Triwing Screwdriver Set. This set consists of two screwdrivers only, but can still get you most of the way through a teardown. Which set is best? Let’s take a closer look, and find out!
Nintendo Switch Disassembly Basics
So, how do you actually disassemble a Nintendo Switch? It depends on what exactly you’re doing. For example, replacing the battery is relatively simple. On the other hand, replacing a blown speaker requires a full teardown. First, here’s a list of the tools you’re going to need:
PH00 Phillips driver
Y00 tri-wing driver
Nylon spudger (or flathead screwdriver)
Suction cup (optional)
Plastic picks (or flathead screwdriver)
Opening tool (optional)
Tweezers (optional)
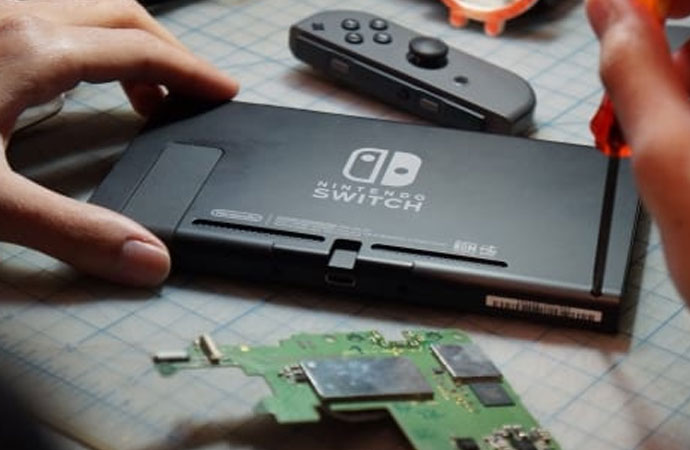
The first thing you’ll notice about the Nintendo Switch is that it doesn’t have any “normal” screws. Instead, it utilizes tri-point screws, which form the center of our reviews. First, remove the screws from the top of the Switch. They’re fairly small, so keep a small dish or magnetized tray handy for holding them. Once you’ve removed the screws from the top edge, the back cover will lift off easily. There are no clips or adhesive strips holding it in place.
Inside, you’ll see a stainless steel shield that covers all the internal components. This shield serves as both a dust guard and a heat protector. The shield snaps into the front edge of the Switch. You can either remove the tabs with a nylon spudger, or use a small flathead screwdriver if you’re feeling brave. Beneath the shield, you’ll see that the microSD drive is easily replaceable.
One part that isn’t easily replaceable is the battery. It’s not designed to be replaced by users; instead, Nintendo offers a paid replacement program. For safety purposes, you want to disconnect the battery before performing any other repairs. It connects to the rest of the unit with a four-pin plug. This plug can be removed by hand, but it’s relatively small, and a pair of tweezers makes it easier. If you want to access other parts, you’ll need to pry the battery loose from its adhesive. Do this gently and carefully with a plastic pry tool. Otherwise, you might inadvertently damage it.
Removing the cooling system is also easy. The heat pipe is connected by a set of small Phillips screws. This makes it easy to remove. Keep in mind that you’ll inevitably disturb some of the thermal paste in the process. So if you’re going to remove the heat pipe, make sure to have extra paste on hand for reassembly. From here, you can easily remove the microSD reader. It snaps in and out with a gentle tug. The headphone jack is also part of this assembly.
To go further, you’ll need to remove the fan. This fan is secured by three small screws. Again, tweezers or a magnetic screwdriver are helpful here. Make sure not to apply too much force when reinstalling the fan. Over-torquing the screws can damage the rubber anti-vibration mounts.
This is about as far as you’ll need to go for most purposes. However, to access the USB Type-C port or the speakers, you’ll have to remove the motherboard. To do that, you’ll need to unplug the backlight, speaker connectors, antennas, JoyCon rails, and digitizer. All of these parts clip in easily, and can be removed by hand or with tweezers. Remove the six Phillips screws, and the motherboard is ready to pop out.
Removing and replacing the USB Type-C port is a bit complex. You’ll need some soldering savvy if you want to do it yourself. On the other hand, the speakers are easy to remove. Once the motherboard is out, they simply pull free of their housing. That said, their wires connect through a tiny plastic connector. Unless you’ve got very small, dexterous fingers, you’re going to need some tweezers to work the plug free.
Another thing that makes the Switch easy to repair is that the digitizer is not fused to the display. In other words, you can replace either part individually. The digitizer is secured to the display with a simple double-sided adhesive strip. Be careful of the cable, though. It’s on the long edge of the display, and needs to be carefully disconnected. Otherwise, you’re liable to damage it.
That’s about all there is to it! Replace whatever parts you need, and reverse the process to put your Switch back together.
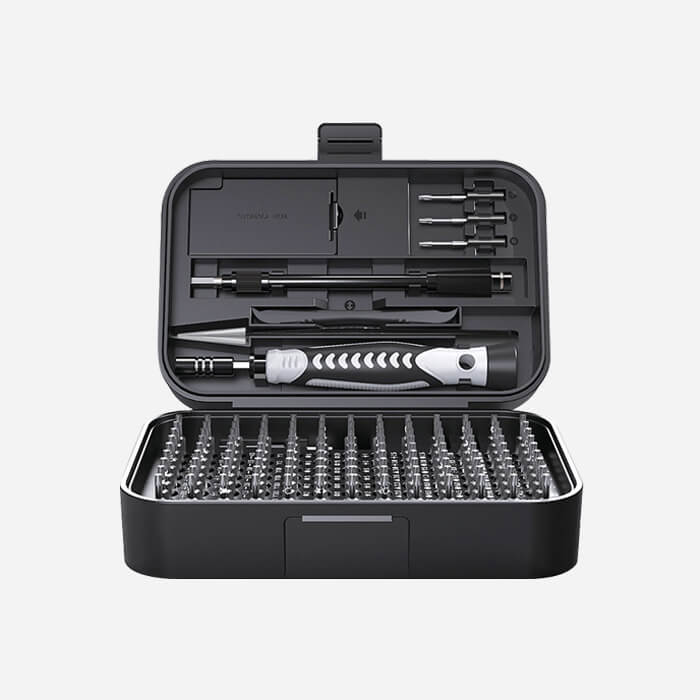
130 Bits Torx Star Screwdriver
[130 IN 1PRECISION SCREWDRIVER SET] Professional 130-in-1 precision screwdriver set is ideal for small-scale jobs like computer or electronics repair. The screwdriver set includes 120pcs magnetic screwdriver bits and 10 auxiliary tools (screwdriver handle, extension shaft, short post, toolbox, tweezers, iPhone pin, suction cup, bracts, pry tool, magnetizer/demagnetizer, etc). It’s a high-quality all-in-one tool.
[MAGNETIC & ERGONOMIC HANDLE] The handle has a non-slip design for a comfortable grip, and the top of the bit carousel spins freely while the screwdriver is in use. The extension shaft has a magnetic feature, strong magnetic tips make it easy to fix bits and pull screws out. Equipped with a 10cm telescopic extension rod which is easy to be extended to a narrow place where the handle cannot enter.
[UPGRADED QUALITY] The screwdriver repair tool kit bits are made of high-quality CR-V with high hardness, excellent precision, and good toughness which can reach HRC52 56, It will not damage the devices. All of the size bits undergo rigorous quality control testing to make sure stable and not easily stripped and guarantee long-time use.
[MULTI-USE BITS] This magnetic screwdriver included 120pcs multi-size bits: Phillips, Torx, Torx with hole, slit, pentagram, pozidriv, Y-Type, hex, triangle, U-Type, square, hexagonal, and handle, extension bar. Electronics magnetic screwdriver set repairing cleaning kit for iPhone cellphone, PC, laptop, computer, Switch, game consoles, watches, glasses, camera, Xbox, other electronic devices, etc.
[CUSTOMER FIRST & QUALITY FIRST] We guarantee a long time to use due to our upgraded excellent workmanship, compared with others, our precision screwdriver set will be strictly inspected before shipment. If you have any issues with the quality or usage, please don't hesitate to contact us through Amazon, we will do our best to help every customer to solve any problem.
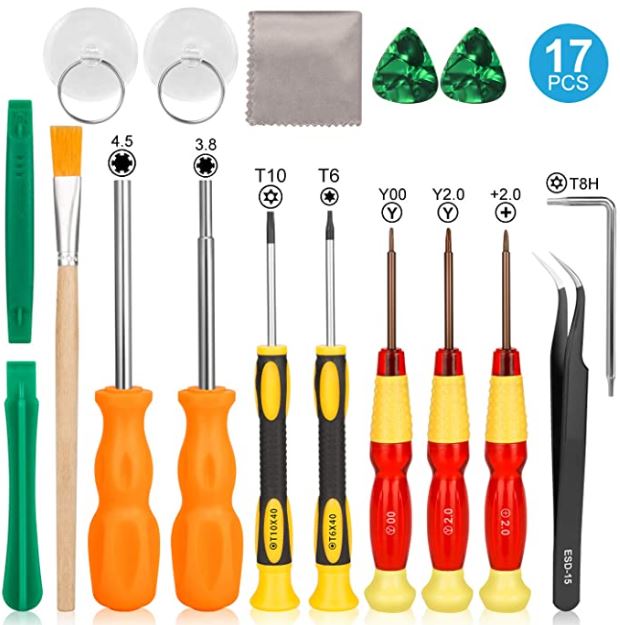
Keten 17-in-1 Triwing Screwdriver Tool Repair Kit
A brief glance at the Keten 17-in-1 Triwing Screwdriver Tool Repair Kitreveals a large number of tools. Indeed, you’ll see several tools that aren’t necessary for repairing the Nintendo Switch. This is because it’s suitable for a variety of game systems, including the Super Nintendo and original Xbox.
In the kit, you get a set of T10 and T6 Torx drivers, Y00 and Y2.0 tri-wing drivers, and a PH00 screwdriver. There are also 3.8mm and 4.5mm security drivers for the Super Nintendo and original Xbox. All of these drivers sport durable rubber handles that allow for an easy grip. And the smaller drivers have rotating heads for easy use in confined spaces. The heads are constructed from S2 stainless steel, which means it won’t strip easily.
In addition, there’s a 90-degree T8 Torx driver for reaching around corners. There’s a nylon spudger for manipulating delicate parts, and a pair of angled tweezers for unplugging connections. You’ll also find a pair of suction cups for holding plates, and plastic picks for prying. There’s even a brush for dusting off parts, and a small cloth for cleaning your display. All of this comes with a lifetime warranty and a 45-day money-back guarantee.
Starko 8-piece Nintendo Switch Tool Kit
The Starko 8-piece Nintendo Switch Tool Kitis a simpler kit than the last. It’s only designed for the Nintendo Switch and JoyCon controller, not other systems. Still, it’s very well designed, and it has everything you need to perform repairs.
For drivers, you get a Y00 tri-wing driver and Y2.0 driver. These are sufficient for disassembling both the switch and the JoyCon controllers. There’s also a small Phillips driver to go along with them. All three drivers have a sturdy green plastic grip, with an ergonomic hourglass profile. The bases rotate, which makes them easy to hold in place while you’re working. The driver tips are constructed from industrial-grade steel for durability and long life.
The kit also includes some other parts to make the job easier. There’s a pair of angled tweezers for working on connectors, and a small plastic pry tool. You get a suction cup for managing the back plate, and a nylon spudger for delicate parts. You also get a dusting brush for cleaning out your vents. The kit includes Starko’s 30-day no-questions-asked return window. If there are any issues, just return it for a full refund.
Final Verdict
As you can see, each of these kits comes with its own advantages. To begin with, the Keten 130-in-1 Screwdriver Tool Repair Kitis an ideal choice for repairing multiple systems. You can use it to fix your Switch, your Super Nintendo, your original Xbox, or even your NES. The versatility is virtually unlimited.
Can the Switch battery be replaced?
The bad news is that there is currently no way for a consumer to install a new battery in the hand-held device or the Joy-Con controllers. While Nintendo hinted at a paid battery replacement service prior to the launch of the system, it has yet to institute such a program.
How do I know if my switch is damaged?
The first sign of trouble is when the switch begins to behave in a fashion that is abnormal in any way. For example, if there's an audible crackle, snap, or popping sound when you flip the lever, then it's pretty clear that your switch is defective and it's time to replace it.
How do you fix a faulty Switch?
Replace a basic electrical switch:
If there are no terminal screws on the switch, insert the straight wires into the appropriate holes on the back of the switch. Attach the wires to the terminals and tighten them. Replace and screw the switch into the terminal box, making sure the switch is plumb–straight up and down.
What is the lifespan of a Nintendo Switch?
This puts the Switch at about five years old in 2023 and the company is now saying that the Switch is only in the middle of its lifespan, indicating that it could be another five years before Nintendo releases a new console.
Does Nintendo do free Switch repairs?
Nintendo systems carry a standard 12-month warranty, which is one of the longest standard warranties in the video game industry. Games and accessories sold individually carry a three-month warranty. Please see the Complete Warranty Text for full warranty details.
Kingsdun is a precision screwdriver manufacturer, if you are looking for a Chinese screwdriver manufacturer, please contact us, we will give you the most sincere advice, thank you